
Washer Leaking Water — Where It Comes From Determines What Needs Fixing
Water on the floor around a washing machine has five distinct sources — and each one requires a completely different repair. A front-load door seal leak and a drain pump housing crack are both “washer leaks” but have nothing in common mechanically. Knowing where the water is coming from is the essential first step.
Before the technician arrives, these steps stop ongoing water damage:
- 1Turn off the water supply valve behind the washer
- 2Unplug the machine — water and electricity near each other is a safety issue
- 3Do not run another cycle
- 4Place towels around the base and note where water appears first
- 5Call WasherDoctor — active leaks are prioritized for same-day response
Why “Where Is the Water Coming From?” Is the First Question That Matters
Most repair guides answer “why is my washer leaking?” with a generic list of possible causes. That is not useful — because a leak from the door area of a front-loader and a leak from behind the machine have nothing to do with each other mechanically, and diagnosing them with the same approach wastes time and money.
The leak location tells you which component to investigate — before calling anyone. If you can observe where the water first appears when the machine runs, you can narrow the cause from six possibilities to one or two. A technician who knows the leak location before arriving can bring the correct parts and complete the repair same-visit rather than diagnosing blind and returning for a second visit.
The important distinction: During fill vs. during spin
When a leak occurs in the cycle is as useful as where it appears. A leak that happens during fill — when water first enters the drum — points toward the inlet system: hoses, inlet valve, or dispenser drawer. A leak during the wash cycle points toward the door seal or drum. A leak during drain or spin points toward the pump housing, hose connections, or (on front-loaders) the door seal being forced by pressure.
Observing two things — where the water appears on the floor and when in the cycle it starts — narrows the cause significantly before a technician arrives.
The Five Sources of Washing Machine Leaks
Each source produces a distinct water pattern and occurs at a specific point in the cycle. Matching your observation to these descriptions confirms which component needs attention.
Door Boot Seal — Front-Load Washers Only
The rubber gasket around the front-load door opening is the most common source of front-load washer leaks. The seal degrades through a combination of use, mold growth in the folds, and — in coastal California communities and hard-water cities — rubber breakdown accelerated by humidity and mineral deposits. When the seal cracks or tears, water bypasses it during the wash cycle and runs down the front of the machine onto the floor.
What you observe: Water appears at the front of the machine, running down the door or from underneath the door frame. Typically occurs during the wash cycle, not just during fill or drain. You may also see visible black mold in the door gasket folds — a sign the seal has been degrading for months before the leak became visible.
California context: Coastal communities from San Diego north through the Bay Area see accelerated seal mold due to ambient humidity. In hard-water cities above 300 ppm (Ventura, Santa Clarita, Glendale), calcium deposits create abrasive conditions that crack rubber faster than national averages predict.
Why it matters beyond the leak: A degraded door seal does not just cause water on the floor. It allows water to reach the drum bearing housing over time — eventually causing bearing failure. A door seal replaced at the leak stage costs $150–$320. A door seal plus drum bearings costs $250–$450. This is why seals should not be allowed to leak long-term.
Inlet Hose Connections
The two hoses at the back of the machine — hot and cold water supply — connect the washer to the household plumbing. Over time, the rubber washer inside the hose coupling degrades, the hose fitting loosens, or the hose itself develops cracks from age and water pressure cycling. Hose failures are particularly common after 5–8 years, during California’s rainy season temperature swings, or if the machine has ever been moved and the hoses kinked.
What you observe: Water appears at the back of the machine, on the wall behind the washer, or dripping from the supply hose connection at the back panel. This leak occurs during fill — when water is actively being pushed through the hoses under supply pressure.
DIY check: With the machine pulled out, run a fill cycle and observe the hose connections at the back panel. A drip at the connection point means a failed washer — tightening the coupling or replacing the rubber washer resolves most cases. A crack or bulge in the hose body itself means the hose needs replacement — this is not a tighten-and-ignore situation.
Washing machine hoses should be replaced every 5 years regardless of visible condition — hose failures are one of the leading causes of catastrophic California home water damage.
Drain Pump Housing or Hose Connection
The drain pump housing and the hose connecting the pump to the drain standpipe are under pressure during the drain cycle. A cracked pump housing — from physical damage, from debris jamming the impeller at high speed, or from age-related plastic fatigue — leaks during drain. A loose or degraded hose clamp at any connection point produces a similar pattern.
What you observe: Water appears at the bottom front of the machine (front-loaders) or from underneath (top-loaders) during or shortly after the drain cycle. May coincide with a drain error code (LG OE, Samsung 5E) because the pump is losing pressure through the crack.
Distinguish from door seal: Door seal leaks occur during the wash cycle, not specifically during drain. If the leak appears or intensifies when you hear the pump running, the pump system is the source rather than the door seal.
Detergent Dispenser Drawer (Front-Load and HE Top-Load)
The detergent dispenser receives water during fill and rinse to flush detergent and fabric softener into the drum. When the dispenser drawer housing cracks, when the detergent buildup clogs the outlet, or when the drawer is not fully seated, water backs up and overflows through the front of the dispenser housing onto the floor. This is often the least obvious leak source — it does not come from the drum, the door, or the hoses, but from a component that most homeowners never inspect.
What you observe: Water at the front of the machine, but from above the door height — from the dispenser area. Occurs during the fill cycle, not the wash or spin. Using too much detergent or the wrong detergent type (non-HE in an HE machine) dramatically accelerates dispenser buildup.
DIY fix: Remove the drawer completely and soak in hot water to dissolve detergent buildup. Clean the housing cavity with a brush. If the housing itself is cracked, replacement is required.
Drum Seal / Tub-to-Pump Hose (Internal)
Inside the machine, a seal connects the outer tub to the drum bearing assembly, and a hose connects the tub sump to the pump. Either can fail after years of use. A tub seal failure allows water to leak past the drum assembly into the base of the machine — appearing as a slow drip from underneath with no obvious external source. The tub-to-pump hose develops cracks or the clamps loosen, producing a similar internal-to-external leak path.
What you observe: Water appears from directly underneath the machine with no visible external source — not from the door, not from the hoses at the back. Often a slow, progressive leak that worsens over time. This leak is the hardest to locate by observation alone.
Overflow From Incorrect Detergent or Overfill
A category of “leak” that is not a mechanical failure: the machine is producing more suds than the tub can contain, and foam pushes through any available gap — the door seal, the dispenser, or the pressure release valve. This is most common in HE front-loaders when conventional (non-HE) detergent is used, or when too much HE detergent is used in a high-efficiency cycle.
What you observe: Suds or foam in the water on the floor, or foam visible around the door seal during the cycle. The machine may show an overflow error code (FE, OE). Running an empty hot-water cycle clears the suds and confirms whether the problem is detergent rather than mechanical.
What to do: Run an empty cycle on hot with no detergent. If no leak occurs, the problem was detergent-related. Switch to HE-rated detergent and use the manufacturer-recommended amount, not a heaping scoop.
Why is my washing machine leaking from the bottom?
A washing machine leaking from the bottom — water appearing directly beneath the machine — most often has one of three sources: a cracked drain pump housing (water leaks during the drain cycle), a failed tub-to-pump hose connection (slow internal leak), or, on front-loaders, a door boot seal leak where water runs down the front inside panel and collects at the base before appearing underneath. The timing in the cycle narrows the source: drain cycle leak = pump area; constant slow leak between cycles = tub seal or internal hose; fill and wash cycle leak = door seal or dispenser. A cracked pump housing is a straightforward repair ($150–$320) but cannot be self-diagnosed without inspecting the base of the machine.
Why Washer Leaks Are More Urgent Than Other Failures
A washer that will not spin is inconvenient. A washer that is actively leaking is a different category of problem — because water damage compounds every hour the leak continues.
Subfloor damage
California laundry rooms are frequently located on upper floors of multi-story homes, or on concrete slabs with wood framing above. A slow leak from a door seal — water running behind the drum, through the base, and soaking into the subfloor — can cause structural damage and mold growth before the homeowner notices a problem. Subfloor repair in California costs $500–$3,000+ depending on the extent of water penetration. Door seal replacement costs $150–$320.
Mold under the machine
In coastal California — San Diego County, Orange County, Malibu, Santa Cruz, the Bay Area — ambient humidity already creates favorable mold conditions. A slow washer leak introduces standing moisture under the machine and behind the laundry room wall, creating mold colonization within 24–48 hours in warm conditions. Mold remediation costs $500–$6,000. Stop the leak before this becomes the more expensive problem.
The seal-to-bearing cascade
On front-load washers specifically, a leaking door boot seal is not a cosmetic problem — it is a structural one. Water that bypasses the seal enters the drum bearing housing and washes out the bearing grease. The result is drum bearing failure, which produces a roaring noise during spin and eventually requires a significantly more expensive repair. Addressing a door seal leak early is the difference between a $150–$320 repair and a $300–$500 repair several months later when the bearings have also failed.
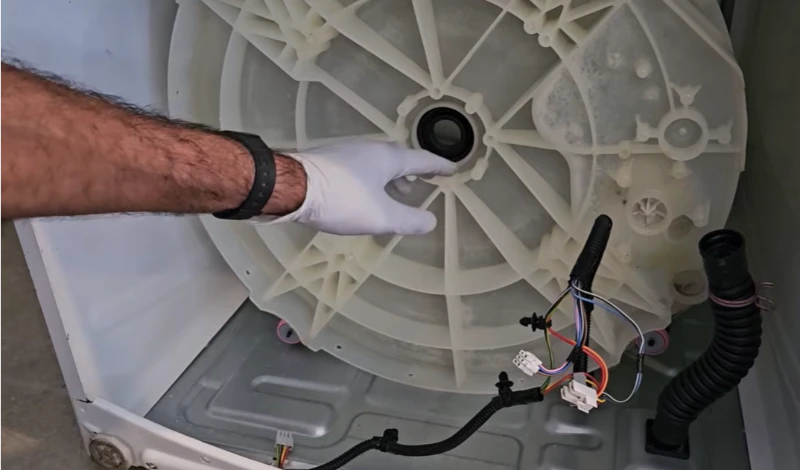
Washer Leaking? Turn Off the Supply Valve and Call WasherDoctor Today.
Active leaks are prioritized for same-day response across California. Turn off the water supply valve behind the washer first, note where the water appeared and when in the cycle, and call. Most leak repairs are completed in a single visit.
Two Checks That Require No Tools
Before calling, two quick observations will help confirm or rule out the most common leak sources.
Check 1 — Supply Hose Connections
-
1
Pull the machine out and look at both rear hoses
Inspect the hot and cold supply hoses where they connect to the machine at the back panel. Look for drips, staining from previous drips, or visible moisture at the coupling fittings. Also check the hose body for bulges or cracks.
-
2
Check the drain hose connection at the standpipe
Where the drain hose enters the standpipe or utility sink connection, look for any water staining or active drips. A loose connection here can produce a floor leak during drain cycles.
-
3
Look at the wall behind the machine
Water staining on the wall behind the washer, even if dry now, indicates a previous hose connection drip. This is worth addressing even after the visible leak is resolved — it can indicate a developing hose failure.
Check 2 — Door Boot Seal (Front-Load)
-
1
Inspect the door gasket fold areas
Open the door and peel back the outer lip of the rubber gasket. Look in the fold areas for black mold, visible tears, cracks, or sections where the rubber has become stiff and no longer flexes smoothly. Any cracking is a sign the seal needs replacement regardless of whether you can see an active drip.
-
2
Feel for moisture in the door seal folds
After a completed cycle, feel inside the gasket folds. Trapped moisture that does not dry between cycles indicates the seal geometry has changed — a precursor to active leaking even if no floor drip has appeared yet.
-
3
Check the detergent drawer
Remove the drawer completely and look inside the housing cavity. Detergent buildup blocking the flush outlet is visible as a white or gray crystallized deposit. If the housing itself is cracked, the crack will be visible as a hairline in the plastic at or near the outlet nozzles.
Washer Leak Repair — California Cases
Three different leak sources, three different repairs. Each diagnosed at the correct point in the cascade — before the damage could compound.
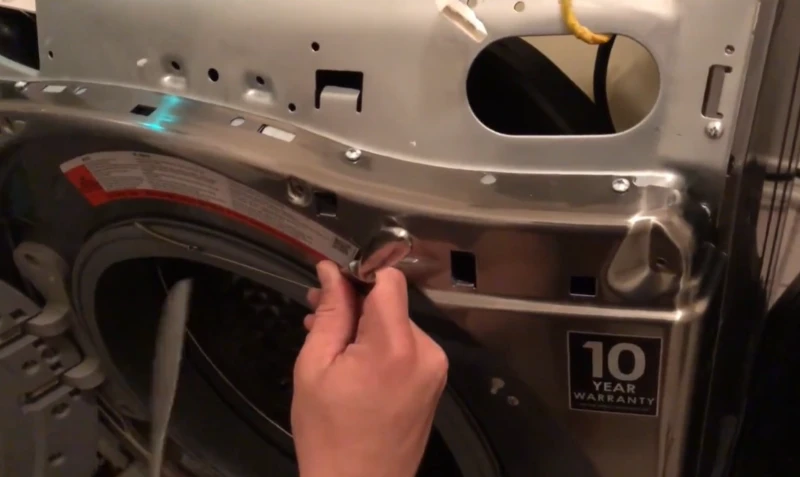
Door Seal Caught Before Full Bearing Failure — Saved $150+ on the Repair
Symptom: Small water puddle appearing at the front of the machine during wash cycles. Customer also noticed a faint musty smell from the door area.
Diagnosis: Cracked door boot seal — visible tearing in the lower seal fold. Coastal Encinitas humidity had accelerated mold growth and rubber degradation. Bearing inspection: early-stage moisture contamination in the housing, but bearings still functional.
Repair: Door boot seal replaced. Bearing housing cleaned and regreased — no bearing replacement needed because the seal was caught before full bearing saturation. If left another 3–6 months, bearings would likely have required replacement alongside the seal.
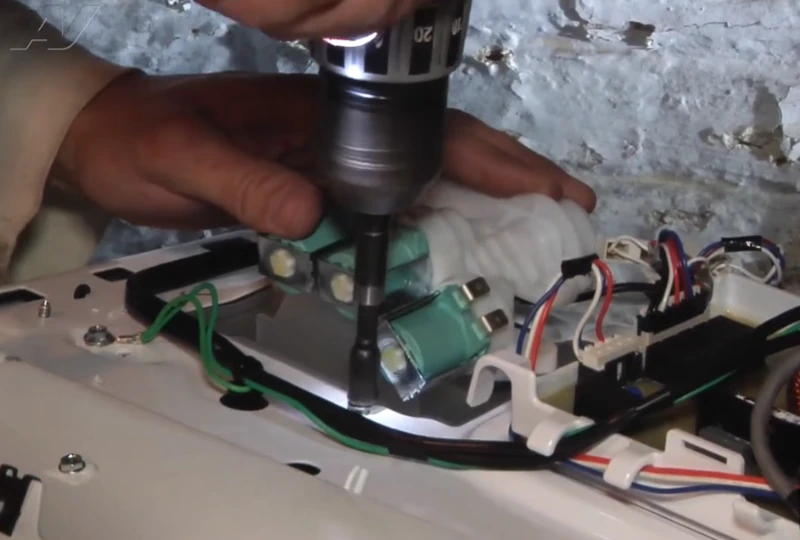
Puddle Behind Machine — Failed Rubber Washer in Supply Hose Fitting
Symptom: Customer noticed a wet patch on the floor behind the washer and water staining on the wall. Leak occurred during fill cycles. No error codes.
Diagnosis: Hot water supply hose coupling — the rubber washer inside the fitting had flattened and cracked after approximately 8 years of thermal cycling. The hose body was also showing early stress cracks near the fitting end. Both hoses replaced (not just the leaking one — replacing one and leaving a same-age hose creates a predictable second failure).
Repair: Both supply hoses replaced with braided steel-jacketed replacement hoses. Water pressure tested before departure. Wall surface behind machine also dried and inspected.
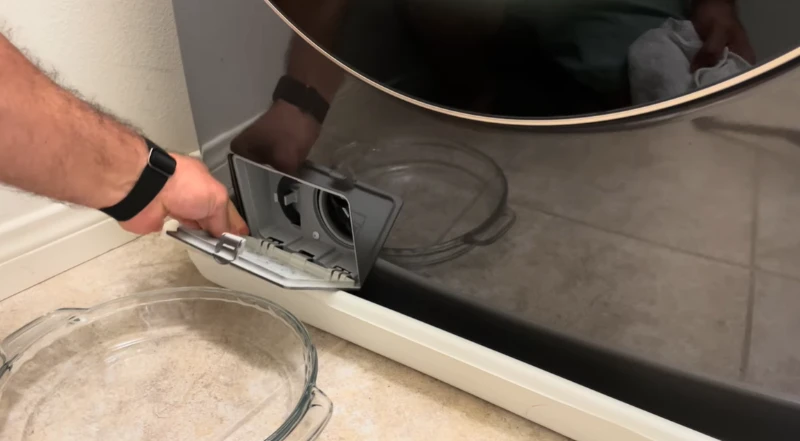
Water Appearing at Base During Drain — Cracked Pump Housing, Not the Seal
Symptom: Water appearing at the base of the machine specifically during drain cycles — not during fill or wash. LG OE error code also appearing intermittently.
Diagnosis: Door boot seal inspected first — intact, no cracks. Drain pump housing inspection revealed a hairline crack in the plastic housing at the impeller chamber, leaking under drain pressure. Ventura’s hard water had deposited mineral scale inside the housing, and the pressure differential during high-volume drainage had stressed a weak point in the housing.
Repair: Drain pump assembly replaced. Mineral scale in the surrounding hose connection also cleared. Machine tested through two complete drain cycles.
Problems Connected to Washer Leaks
Washer Not Draining
A drain pump housing crack causes both a leak and a drain failure simultaneously. If your machine both leaks and shows a drain error code, these problems share the same source.
washer not drainingWasher Making Grinding Noise
If a door seal leak has been present for months, drum bearing failure often follows. A roaring noise during spin alongside a leak history points to seal damage having reached the bearings.
washer grinding noise during spinWasher Stops Mid-Cycle
Some machines detect water at the base via a float switch and halt the cycle as a safety response. If the machine stops mid-cycle without an obvious cause, a small internal leak may be triggering the safety circuit.
washer stops mid-cycleFront-Load Washer Repair
Door boot seal leaks, drain pump housing cracks, and drum seal failures are primarily front-load issues. The full diagnostic and repair approach for California front-loaders.
front-load washer repair CaliforniaSame-Day Emergency Service
Active leaks are treated as emergencies. Call before noon for same-day scheduling — Saturday service at no extra charge across California.
same-day emergency washer repairWasher Door Won’t Open
On front-loaders, a door boot seal replacement may require accessing the door lock assembly. If both problems exist simultaneously, they are often addressed in the same service visit.
washer door won’t openWasher Leaking — Questions & Answers
In most cases yes — particularly for machines under 10 years old. Door boot seal replacement ($150–$320), hose replacement ($100–$160), and pump housing repair ($150–$320) are all well under 50% of replacement cost in California where new washers run $700–$1,100. The situation that changes the math: a bearing failure that has progressed alongside a door seal leak on a machine over 9 years old, where the combined repair cost approaches $350–$500. A technician can assess whether the leak has also caused secondary damage before recommending a repair or replacement path.
No — and specifically for front-loaders with a door seal leak, every cycle continues to drive water into the bearing housing, accelerating bearing damage. For all types, even a small leak introduces water to areas of the machine and laundry room not designed to handle moisture. The risk is not just machine damage — it is subfloor damage, mold growth behind the wall, or water reaching electrical components. Turn off the water supply valve and do not run cycles until the leak is diagnosed.
A front-load washer leaking from the door area almost always indicates a degraded door boot seal — the rubber gasket that creates a watertight seal between the door and the drum opening. The seal degrades through cracking (from age and hard water mineral deposits in California’s high-hardness cities), mold growth in the fold areas (accelerated by coastal humidity), or physical damage from foreign objects trapped between the drum and seal. Inspect the full circumference of the gasket — tears are often in the lower fold area where water pools. If the seal shows any cracking or visible damage, it needs replacement regardless of whether the leak is currently small.
Standard rubber washing machine hoses should be replaced every 5 years, regardless of visible condition — rubber degrades internally in ways that are not visible externally until failure. The industry recommendation is braided steel-jacketed hoses, which last significantly longer and are far more resistant to sudden burst failures. Washing machine hose failures are one of the most common causes of significant home water damage in California — the hose fails under fill pressure while the machine is running unattended, flooding the laundry room and sometimes the floor below before anyone notices.
A top-load washer leaking from the bottom has three common sources: the pump housing or pump hose connection (leaks during drain), the tub-to-pump hose (slow internal leak that appears underneath), or the outer tub seal (allows water to pass around the agitator shaft seal and drip from beneath). The timing of the leak in the cycle narrows the source: if it drips during drain, the pump area is most likely; if it leaks throughout the cycle or between cycles, the tub seal or internal hose is more likely. A top-load washer that also has poor agitation or spin alongside an underside leak may have an agitator seal failure causing both symptoms.
Washer Leaking? WasherDoctor Finds the Source — Not Just the Symptom.
Active leak repair prioritized same-day across California. Turn off the supply valve, note where the water appeared and when in the cycle. Written estimate before any work begins.